How to Use
Introduction
Imaging evaluation of the pediatric retroperitoneal spaces is complicated by complex 3D anatomy. While hard copy atlases of the retroperitoneal spaces exist, these often show only a few selected images of relevant anatomical structures. To facilitate understanding of the imaging anatomy of the retroperitoneal spaces, we constructed an online, large data-set, digital computed tomography (CT) atlas which demonstrates the normal appearance of the retroperitoneal spaces, as well as an atlas which demonstrates color shading of the anterior paranasal, perirenal and posterior pararenal spaces. In addition, we assembled a teaching file of CT cases, comprised of entire imaging exams that show a variety of congenital infections and neoplastic and inflammatory pathologies.
To start the program:
You can start the program from the Start menu, in the Programs folder, under RetroperitonealSpaces Atlas. Alternatively, you can run the program by opening up the atlas folder and clicking on the file RetroperitonealSpacesAtlas.exe. You can place a shortcut on the desktop for ease of starting the program.
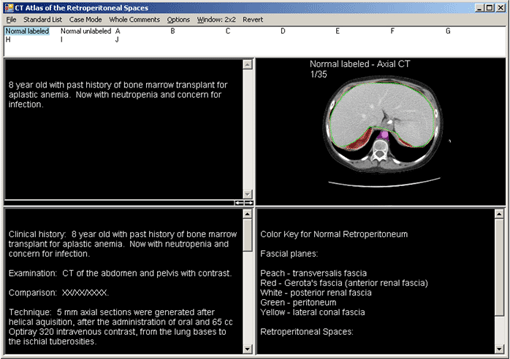
By default, the module opens in Case Mode (Single Patient, Multiple Series) in a 2x2 box. The upper left window gives the History (Hx), followed by the normal labeled exam in the window to the right. The lower left window gives the report and the lower right box displays a key to the image.

Basic Image Navigation - Quick Start
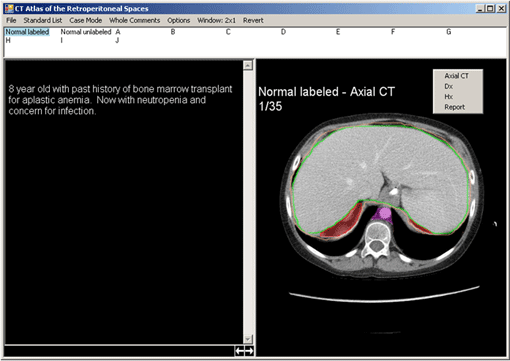
The box below the menubar contains a list of cases/patients in the module. The first two cases listed are normal labeled and unlabeled exams, followed by 10 unknown cases with pathology. The highlighted case/patient is the one currently assigned to the viewing windows. You can click on any case in the list to start with a new case in the viewing windows, or you can click on the forward and reverse arrows in the first viewing windowto move through the cases. You can view teaching file cases in known or unknown format by clicking the Optionsmenu and selecting Alternate List Names. [The best way to view the cases as unknowns is probably in a 2x1 window with history on the left and images on the right (as seen in the below image). See Window Sectionat the end of this tutorial to learn how to switch from the default 2x2 window to a 2x1 window.]
Hold down the right mouse button to select a different series or text (such as DX, Hx, or Report) to place in a viewing window.

To scroll forwards or backwards through a series, left-click a window and hold the left mouse buttonas you move the mouse up or down. By default, all appropriately linked windows will scroll at the same time as the window you scroll. If you want to unlink or re-link image scrolling, go into the Optionsmenu and uncheck or check the Link Image Sets When Scrollingoption.
Menubar Controls
Case list selection:
The default case list is the Standard List, which contains all of the cases. By clicking Standard Liston the menubar you can switch to another list format.

Expanded Listoption is not applicable for this particular module.

The Checked Onlylist adds checkboxes next to the Standard List cases. This allows you to customize exactly which cases are to be viewed. In this mode, only the checked cases will be shown in the viewing windows.
Mode selection:
The initial display mode is Case Mode. You can change the display mode by clicking Case Modeon the menubar and then selecting one of the three options that appear. This will then change the menu title to the newly selected option.

Case Modeallows you to compare multiple series of a single patient. Only one patient will be displayed at a time (the default is the patient in the upper left window, the normal labeled). You must right-click each viewing window to load different series for the selected patient. Changing the selected patient will change all the viewing windows and load the selected series for the new patient. (Note: In this module the only series is Axial CT.)
Compare Modeallows you to simultaneously compare the same series over multiple different patients. If you right-click a viewing window and select a series, the program will open that series for all of the selected patients. Only one series can be shown at a time in compare mode. To scroll forwards or backwards through a series, left-click a window and hold the left mouse button as you move the mouse up or down.
Sheet Modeallows you to view one series from one patient in detail. It opens the series currently residing in the first viewing window into an array viewing mode simulating a printed sheet of film.
Comment selection:
Show Whole Comments Only: In this mode comments for Hx, Dx and Report will take up the full window. (For this module Show Whole Comments Only should always be selected.)

Options:
Scrolling Through Series: To scroll through a series, left-click and hold on a window as you move the mouse up or down. This will scroll forwards or backwards through the series. If the series are linked, as they are by default, all appropriately linked viewing windows will scroll at the same time as the viewing window you scroll. If you want to unlink or re-link the image scrolling, go into the Options menu and uncheck or check the Link Image Sets When Scrolling option.

Alternate List Names: Each case has two names so that they may be viewed in known or unknown format. To toggle between the two names, simply click the Option smenu and check or uncheck Alternate List Names.
Window selection:
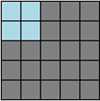
The viewing windows start out as a 2x2 array. To change the layout of the viewing windows, left-click the Window: 2x2menu option. This will pop up a small window with a 5x5 grid as shown:

Move the mouse around on the grid to select the new viewing window arrangement layout that you want, and then click it. The viewing windows will rearrange themselves and load the appropriate series automatically.
