How to Use
Interactive Digital Atlas of Skeletal Dysplasias
S.E. Parnell, C. Wall, E. Weinberger
Seattle Children's Hospital, University of Washington School of Medicine, Seattle, WA
Introduction
Skeletal dysplasias are conditions of abnormal bone or cartilage growth resulting in short stature. Several comprehensive textbooks exist which provide rigorous descriptions of the radiographic and clinical findings encountered with the skeletal dysplasias. While very helpful, it can be challenging to compare and contrast multiple dysplasias simultaneously (either with each other or with normals). This module provides the participant with an alternative method of learning the skeletal dysplasias, in which images from skeletal surveys of patients with several different skeletal dysplasias and representative normals are displayed in a mini-PACS environment allowing for improved direct comparison.
The program is written in C# and runs on any PC with Windows 2000, XP, VISTA, or Windows 7. One may easily scroll between various views of the skeletal survey, such as lateral spine or AP pelvis. Cases may be viewed in known or unknown format, and instructive comment fields may be turned on or off. A compare feature allows multiple different cases to be viewed simultaneously, enhancing the learning experience. This module is comprised of skeletal surveys of 13 of the more commonly encountered skeletal dysplasias and also includes representative normal skeletal surveys of a 5-week-old, 2-year-old and 9-year-9-month-old for comparison.
Launching the Program
Once installed, the program can be launched from the Start Menu, in the Programs folder, under SkeletalDysplasia Atlas.
By default, the necessary files and folders will be located in the following directory: C:\CHRMC\Skeletal Dysplasia Atlas\Atlas. The folder entitled "Atlas" contains all the files necessary to run the atlas module. The program can also be launched by clicking on the file SkeletalDysplasiaAtlas.exe. A shortcut can be put on the desktop for ease of starting the program.
Basic Image Navigation - Quick Start
By default the skeletal dysplasia atlas opens in Compare Mode (Multiple Patients, Single Series) with a 4x4 grid of images in a "mini-PACS" environment displaying AP view of the pelvis for 13 different skeletal dysplasias and 3 normal comparison cases.
It should look something like this:
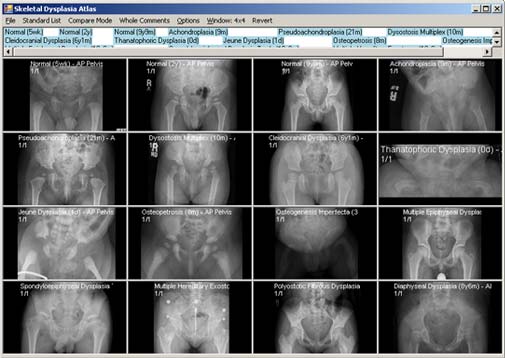
Opening screen of the skeletal dysplasia atlas in compare mode, displaying a 4x4 grid of AP pelvis images in a "mini-PACS" environment for 13 skeletal dysplasias and 3 normals of varying ages.
![]()
You will notice a menu bar above the images that provides several dropdown menus. These will allow you to manipulate the number of cases, number of images displayed, as well as accompanying comments.
![]()
The box below the menu bar contains a list of cases/patients in the module. The highlighted case (s) are the ones currently assigned to the viewing window. You can click on any case in the list to start with a new case in the viewing windows, or you can click on the forward and reverse arrows in the first viewing windowto move through the cases.
Right-click the mouse button to select a different series (including both image series such as "AP Chest", "Lat Skull" and text series such as "Age" and "Report") to place in a viewing window.
A few series (such as AP Arm and AP Leg) have multiple images. To scroll forwards and backwards through these images, left-click on a window and use your mouse wheel.
By default, all appropriately linked windows will scroll at the same time as the window you scroll. If you want to unlink or re-link the image scrolling, go into the "Options" menu and check or uncheck the "Link Image Sets When Scrolling" option.
The atlas can be resized by putting the mouse cursor on a corner of the atlas, left-clicking the mouse and dragging the mouse across the screen.
Menu Bar Controls
Window selection
The viewing windows start out as a 4x4 array. To change the layout of the viewing windows, left click the Windowmenu option. This will open a small pop up window with a grid as below. Drag the cursor over the grid to select the number of boxes preferred and release. For instance, you can select a 3x2 grid as shown:
![]()
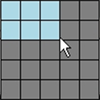
The viewing windows will rearrange themselves and load the appropriate series automatically. Note that the highlighted cases in the box below the menu bar are the ones currently assigned to the viewing windows. You can alter the cases being displayed on the grid by clicking on various names in this box or you can click on the forward and reverse arrows in the first viewing windowto move through the cases.
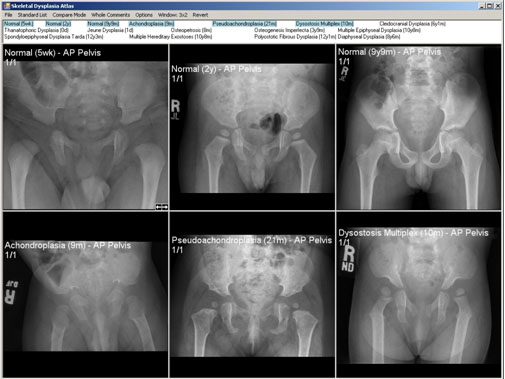
Skeletal dysplasia atlas with 3x2 grid demonstrating AP pelvis images of 3 normals and 3 skeletal dysplasias.
Selecting images to view
Once you have selected the number of images to review, right-click the mouse button over any image to select a different series to place in a viewing window.The series listed in bold are the ones available for the given patient being viewed, and include radiographic views such as "AP Chest" or "Lateral Skull" as well as text containing series such as "Age", "Diagnosis" (Dx) and "Report".
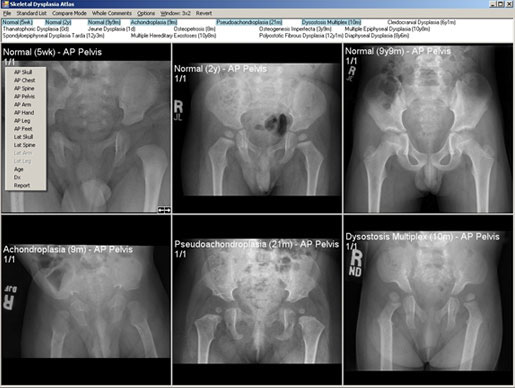
By right-clicking over an image, a dropdown menu will let you select various views from the skeletal survey, as well as items such as Age, Diagnosis (Dx), or Report.
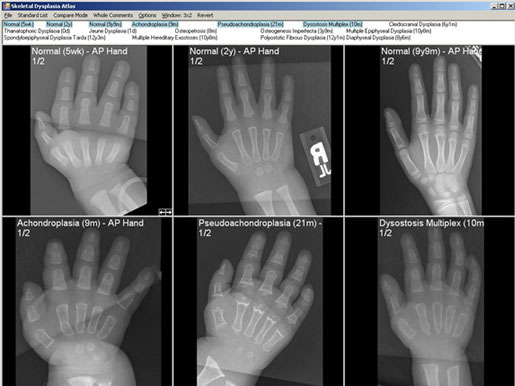
In this example, "AP hand" was selected from the dropdown menu.
Comment selection

The image sets have comments associated with them. Some comments apply to every image for a given case/patient, while other comments are specific for a given series or even a single image. There are four modes for viewing comments, which can be changed from the comments menu.
No Comments:No comments shown.
Show Single Image Comments:When you move the mouse over an image, any comments associated with the image will pop up and be shown.
Show All Image Comments:A small comment window will pop up at the bottom of every image window and stay visible, showing the comments associated with each window's image. Some comments, such as Age, Diagnosis (Dx) and Report, will fill up the entire viewing window.
Show Whole Comments Only:With this feature selected, only comments relating to Age, Diagnosis (Dx) and Report will be shown.
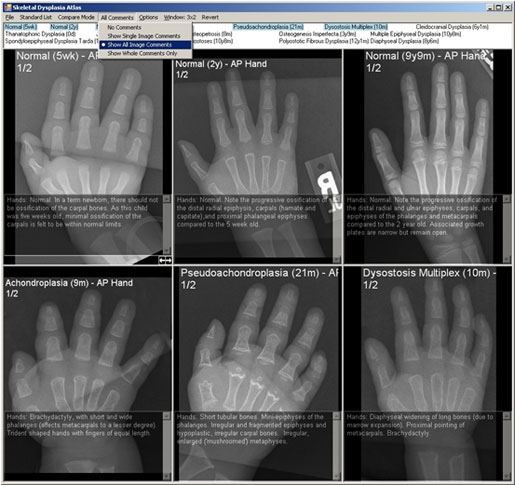
In this example, Show All Image Comments has been selected to display semi-transparent comments related to the images shown.
Case list selection

The default case list is the Standard List,which contains the core, or most applicable cases. By clicking on Standard Liston the menu bar you can switch to two other lists.
Expanded Listis a future capability allowing for additional cases to be added.
The Checked Onlylist adds checkboxes next to the Standard List cases. This allows you to customize exactly which cases are to be viewed. In this mode, only the checked cases will be shown in the viewing windows. This feature is most useful when using Compare Mode (see Mode Selectionbelow).
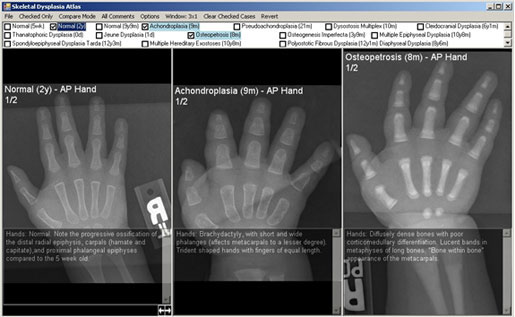
In this example, specific comparisons are being made between a normal hand and two different skeletal dysplasias. Semi-transparent comments are also enabled.
Mode selection

The initial display mode is Compare Mode.You can change the display mode by clicking Compare Modeon the menu bar and then selecting one of the three options that appear. This will then change the menu title to the newly selected option.
Case Modeallows you to compare multiple series of a single patient. Only one patient will be selected at a time (the default is the patient in the upper left window). You must right click on each viewing window to load different series for the selected patient. Changing the selected patient will change all the viewing windows and load the selected series for the new patient.
Compare Modeallows you to compare the same series over multiple patients. If you right click on a viewing window and select a series, the program will open that series for all of the selected patients. Only one series can be shown at a time in compare mode. To scroll forwards and backwards through a series left-click on a window and use the mouse wheel.
Sheet Modeallows you to view one series from one patient in detail. It opens the series currently residing in the first viewing window into an array viewing mode simulating a printed sheet of film.
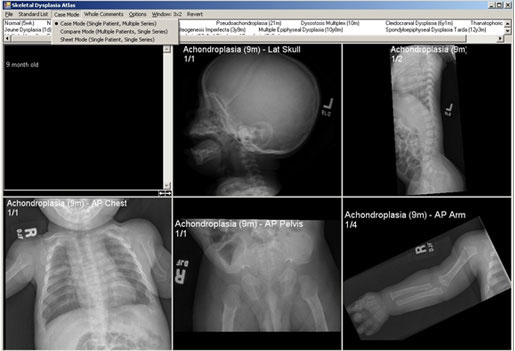
Achondroplasia case is shown in Case Mode.Multiple different radiographic views of the same skeletal dysplasia may be seen at once. A separate window may be designated for the report or age, as seen in the left upper image.
Options selection
Scrolling Through Series:To scroll through a series, left-click on a window and use the mouse wheel to scroll through the series. If the series are linked, as they are by default, then all appropriately linked viewing windows will scroll at the same time as the viewing window you scroll. If you want to unlink or re-link the image scrolling, go into the Options menu and uncheck or check the Link Image Sets When Scrolling option.
Alternate List Names:Each case has two names so that they may be viewed in known or unknown format. To toggle between the two names, simply click the Options menu and check or uncheck Alternate List Names.The skeletal dysplasia cases will be renamed as "A" through "M", with "N1" through "N3" representing the normal skeletal surveys.
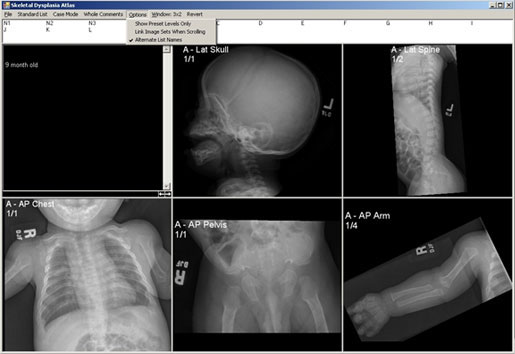
Achondroplasia in Case Mode in unknown format. By selecting Alternate List Names, the letter "A" replaces the known diagnosis within the box below the menu bar and within the top left hand corner of the images.
Suggested Way of Looking at Unknowns
- Change the viewing panes to a 3x1 window using the Window tab of the tool bar.
- Using the mode selection tab, change from compare mode to case mode.
- Using the Options tab of the tool bar, select "Alternate List Names" so that the cases now show up as unknowns.
- Select one of the cases from the list of unknowns.
- In the first box, right click and pick "Age" series. In the second and third boxes, right click and pick any of the image series of your choice.
- Under dropdown menu for Comments choose "Show Whole Comments Only."
After you look at a case, you can right click in the first box and select "Report" to look at the diagnosis and findings.
Questions or Comments?
For any questions or comments, please send email to Shawn Kamps, MD.
